
Step One: Sherlock Holmes and the Case of the Subfloor First things first, you’ll need a subfloor that’s as clean and firm as a detective’s resolve. Grab a broom or a vacuum (no, not a magnifying glass) and ensure there’s not a speck of dust or dirt on your stage. Stone, concrete, or wooden floors will do splendidly—no need for a red carpet underlay here. If you’re tearing up old carpet, think of it as peeling back the layers of a mystery. Got a glued-down carpet? It’s time for some serious detective work with a hook blade knife or a carpet lifting tool. Spot a damp patch? Seal it off faster than you can say “elementary!”
Step Two: Measure Twice, Cut Once
Every tile has its direction, just like every compass points north. But here, you get to choose your north. Will it be monolithic or a snazzy quarter turn? Grab your tape measure and channel your inner architect to find the heart of your room. Use chalk or pencil (not a quill, please) to mark your findings. Try laying a few tiles dry to see how the land lies—adjust as needed to avoid tiny slivers of tile by the wall. And by the way, if you are looking for a really nice, liong lasting carpet tile then you may want to consider Forbo Tessera Cloudscape carpet tiles.
Step Three: Glue It Like You Mean It
Time to break out the carpet tile tackifier adhesive, which sounds a bit like a gadget from a spy film, doesn’t it? It’s basically the MI6 of adhesives—clever and discreet. Apply it carefully (no finger painting allowed), and wait for it to clear up like a good mystery before laying down your tiles. Remember, this isn’t a race; it’s more like brewing a good cup of tea. And remember, it’s called tackifier fopr a reason. It doesn’;t dry out it is designed to be tacky or moist so you can pick up, move por replace a tile whenever you need to. This makes carpet tiles much easier to fit than carpet for example.
Step Four: The Art of Tile Tetris
Start from the centre mark and work your way out like you’re building an empire—tile by tile. Make sure they’re snug as a bug with no pesky carpet fluff escaping between the joints. Use double-sided tape to thwart any rebellious tiles planning a great escape. NMow, a smarty person generally tessalates the carpet tile so that means turning each one 90 degrees next to the other. Makes a much better pattern and a nicer finish
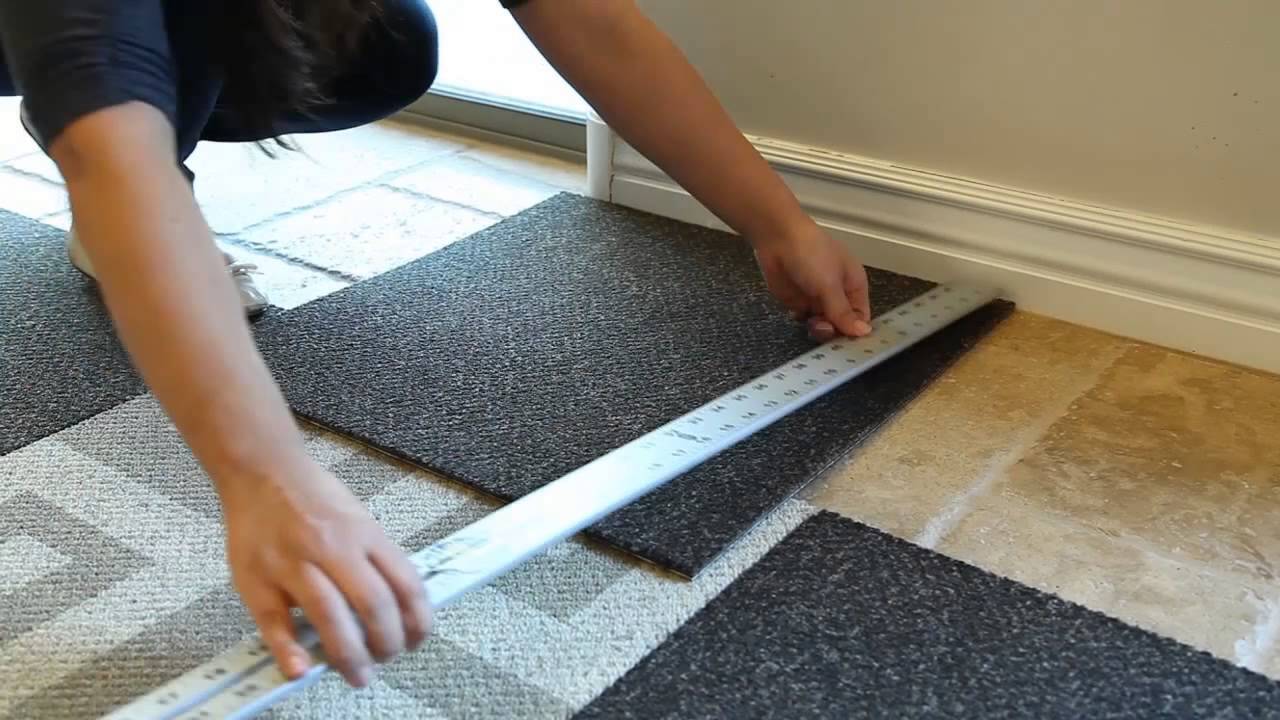
Step Five: The Final Cut
Now, don the persona of a skilled surgeon as you make the final cuts. Score the back of each tile gently—think of it as carving your initials into a tree—then snap and cut for a clean finish. Once all the pieces fit, give the floor a good hoovering; there’s likely to be a bit of a mess after such an operation.
Carpet Care: Keeping Your Floor Spiffy
Regular vacuuming is the name of the game here. Treat any spills with the urgency of a 999 call, and use a gentle touch with a damp cloth. If you encounter a stubborn stain, try relocating it to where it’ll be seen by fewer judgy eyes. And always keep some spare tiles, just like you’d keep a spare tyre—just in case.
By following these steps, you’ll not only have a floor to be proud of, but you’ll also have a bit of fun along the way. Because, let’s be honest, if you’re going to spend your afternoon fitting carpet tiles, you might as well make it a party, right? Cheers to your new fabulous floor! And by the way, if you really can’t be bothered to fit you own carpet tiles then get a carpet tiles contractor to do it for you!


+ There are no comments
Add yours